Description
Product Description


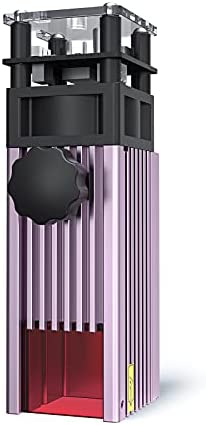
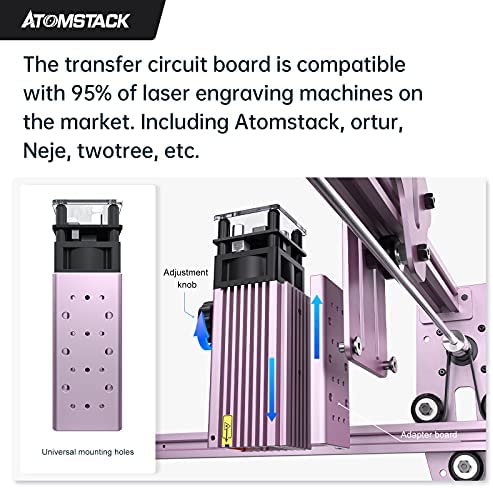
ATOMSTACK M40 laser module is compatible for 95% laser engraving machines on the market(US Plug)
* Item Model: ATOMSTACK M40 laser module
* Laser Power:40W
* Laser Power: 5Watt
* Cutting Speed: 2mm/s
* Time: One-time
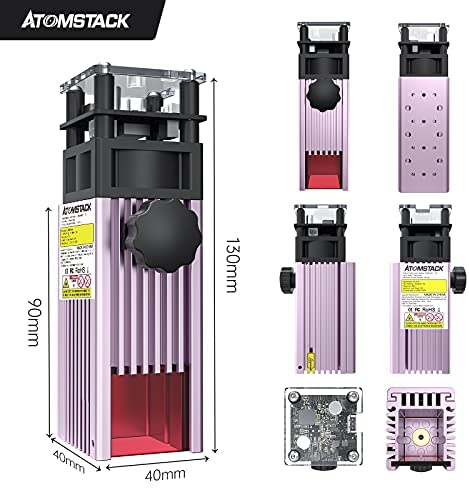
* Product Size: 130mm*90mm*40mm
* Circuit Board Size: 40*40mm
* Circuit Board: 12V/PWM modulation board
* Fan: 12V
* Product Material: Aluminum 6061 anode
* Engravable Materials: wood, bamboo,cardboard, plastic, leather, PCB board, aluminum oxide, non-reflective electroplating layer and lacquered metal, after blackeningUtility knife.
* Cutable Material: cardboard,non-woven fabric, veneer, acrylic, some thin plastic board.


The ATOMSTACK advantage
ATOMSTACK is on a mission to develop Laser engraver cutting and 3D printing field that enables mass production of customized end-use products for people. Atomstack is a professional team focused on advanced desktop and has years of experience in design and manufacturing. Our team are like friends and family, we have a passionate heart. We hope that the products and services we provide can make everyone enjoy fun.
Cutting Effect Comparison
4mm Thickness Plywood
Upgraded fixed-focus laser engraving cutting module,compatible compressed spot laser focusing-free eye-protecting laser 5w laser module,can be used for laser cutting machine, laser engraving machine, CNC, DIY laser.
It has excellent characteristics, the cutting speed is 2mm/s. After installing it on 95% of the laser cutting machines on the market, you can cut on these materials, such as cardboard,non-woven fabric, veneer, acrylic, some thin plastic board. It can meet your daily DIY needs.
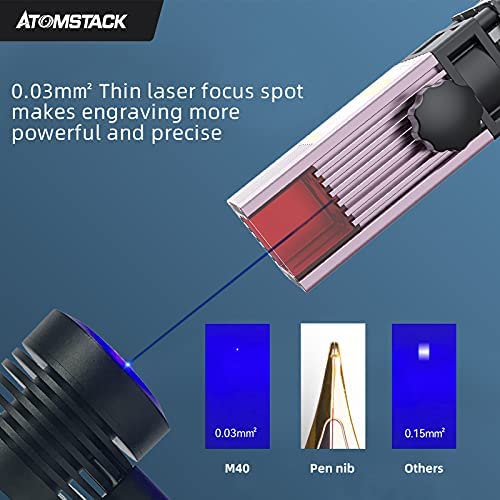
0.03mm² Compressed Spot
Easy Installation
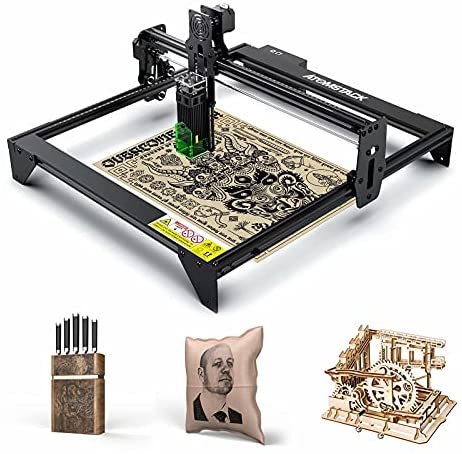
Compatible with 95% of laser engraving machines on the market
Every Single Detail We Made Uniquely is To Ensure To Present The Perfect Experience
|
|
|
|
|---|---|---|
|
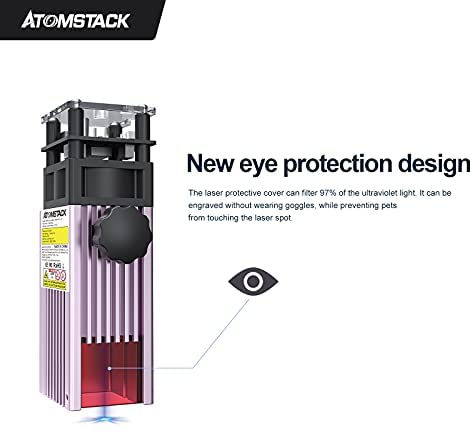
Eye Protection Design
|
Precision Carving Cutting
|
M40 Laser Module
|
|
|
|
|
|---|---|---|
|
Beam Taper & Light Path Comparison
|
0.03mm² Compressed Spot
|
Dedicated Adapter Board
|


Before Using The Laser Module, Please Read User Manual Carefully
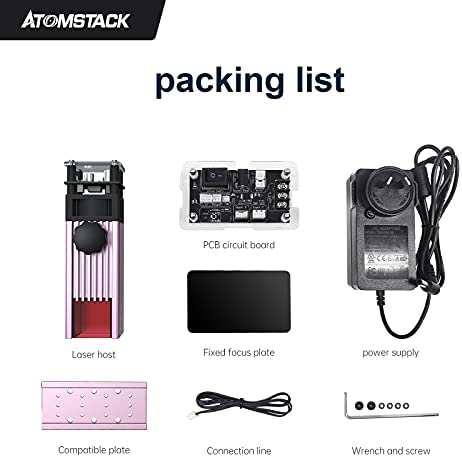
Package List:
1 x Laser Host
1 x PCB Circuit Board
1 x Fixed Focus Plate
1 x Power Supply
1 x Compatible plate
1 x Connection Line
1 x Wrench And Screws


Aaron –
At first it’s a little confusing to set up (mainly because I’m not very handy) but its super straight forward. I bought this because I had a little shop that I sell stuff on Etsy. I wanted to create a small thank you gift for my customers, so I decided to start engraving cans with their names on it. I came across this on Amazon and it has worked perfectly for me. It kinda reminds me of those coca- cola bottles with peoples names on them, except you can personalize it with what you want. Would highly recommend because it’s affordable!
Teresa –
Aun no he podido usarlo pero se ve de muy buena calidad
Edgar G. –
The media could not be loaded. Great atomstack rotary tool. Great thing to have if you want to cut into cups, wine glass, soda cans, and even a bat. Anything that is circular on the outside. Is super easy to set up just connect the wire to the y axis and you’re all set to go and laser print. Work pretty well with the atomstack A5 printer.
Eric Z –
The media could not be loaded. Came in well packaged, and instructions were simple and clear. You put the feet on to raise the machine, choose the correct cable, I’ve got the A Pro so I used the white cable one, and make sure you have the roller parallel to the axis with the laser. Dropped the files into LaserGRBL as usual and this thing just ran. Literally set up in less than 10 minutes.Now, time to engrave all the round objects!
🌟 FilipinaShopaholic 🌟 –
This saves me so much more time when I engrave glasses and cups. Its Easy To Use and comes with guides. Makes my crafting easier!
Thomas Goodroad –
The media could not be loaded. I have been wanting a laser engraver for a while. I have several 3D printers, and love messing with them. After a bit of research, I decided on this one, and I am glad I did. I am totally new to engravers, before today I have never even seen one work, so believe me when I say that setup is easy. You put together the four rails, put on the four feet, the laser carriage, attach the belts, bolt on the laser, and plug it in. Boom. That’s it. Couldn’t be easier.In a similar vein, I did zero research on what program to use to run it. I hadn’t even thought about it. I’m kind of a, “Eh, I’ll figure it out as I go.” type of guy, so again, trust me when I say it’s easy to learn the program as well. I’m learning LaserGRBL, it’s free, and easy. After two youtube videos, I engraved my first piece. And then my second. And now I can’t stop.This laser in particular seems to be of good construction. I saw zero burrs on any of the machining, everything screwed together square with no problems, and everything is in good order. The instructions, while rife with grammar and spelling mistakes, are still clear and easy to understand.As you can see in my video, they have included a few test pieces for you as well as some protective goggles, which is nice so you can try out a few different things before investing in your own test materials.While this is minor, it bears mentioning. In the description, it says this is a silver color. In reality, it has more of a pinkish hue. Not a problem or anything, since they color match all of the pieces, including the plastic endcaps. So that is a nice detail. But still, it isn’t quite accurate in the description. also, the bag that contained the laser module was not closed. Thankfully, I didn’t drop it and it didn’t slide out in shipping due to the careful packing job, but it bears mentioning. It almost seemed like the bag was too small, as it wouldn’t close right when I tried either. But it still functions with no issues.I look forward to adding this to my maker bench and getting accessories for it, such as the roller. I’m hoping this will be a gateway to bigger lasers, such as a carbon laser to engrave metals. Time will tell.As I learn more about this, if anything sticks out at me, negative or positive, I’ll update this review. But as of right now, November 2021, I am happy with everything.
Nicolás Tosolini –
This laser module is wonderful. Great design and good quality materials. It’s a very good option for acurate cutting and engraving. I accidentally broke the connector cable and they sent me a new one in replacement. Very good service! Thanks 👍🏻
Immovable World –
This review is for the ATOMSTACK R3 Laser Rotary Roller. In the box you get the roller itself, a cord to connect to your y/x axis that comes in 2 parts with one being for a specific type of printer and the other for more types, and 4 legs to adjust the height of your laser engraver to accommodate this roller. The cord for this is about 8 to 10 inches long.The instructions state this is compatible with Neje, Nasum, and Ortur laser engravers without needing to adjust the pulse but that if you use another maker than those listed you may need to adjust the pulse. I found it interesting that ATOMSTACK was not listed as compatible even though it clearly is. There are instructions included for how to change the pulse if required.When setting this up for use you will need to make sure of some things so that you get the best chance at good results and do this the right way too. This assumes you want to use this roller on the y axis and let the x axis of the engraver move. You can do it the opposite way as well but lets focus on the y axis here.1. The laser must be above the part in the middle of it where you are intending to engrave it. Make sure the laser head must be in the work area or above the object basically or you may have issues. This is simple so don’t worry.2. Use the spacer that is given in the box. This is here for a reason and it makes everything easy. You place the space between the object and the bottom of your laser and when it it that exact distance your laser will be focused on the object properly. You can do this different ways depending on your exact laser but if you have an ATOMSTACK A5 there is a knob on the front of it to adjust the laser height easily.3. Very important to remember that the area with the belts that control the rollers must always be outside of the lasers working area. If not the belts may get destroyed by the laser which would not be fun to replace.I was surprised with how easy this was to get going. I expected to have to change several things with the engraver itself and in the end you just need to position the laser head correctly and then plug this rotary roller into the y axis of the laser engraver. That’s it other than setting the box up for your exact object width. Instead of the machine moving the laser head along the y axis it will roll the roller which in turns rolls the object and that is how this works. Very smart design for these types of rollers because it is so simple.The only part of this unit that I really had any issues with is the system for changing heights of the rollers. It isn’t even a bad system honestly and it works very well. What bothers me so much about it is it could be much better and easier to use. Currently you have to unscrew 4 total thumbscrews to adjust the height and they are a bit fiddly to get back in. This is screaming for an update where you could just pull them out towards you and move the roller up then push it back in to lock it. That would be an amazing change to this.Important thing to note here is because of the potentially short cable and you needing to flip this device you must invert and/or rotate the image you use for this. You will have to try it on a test object to see what I mean but there is a certain orientation you must use to have the image print right side up. Funnily enough a great test object that you already own is a soda can. Be gentle with the power levels here but you can use those as endless test subjects and it just burns off the anodized coating on them.Overall this is a really neat accessory for your laser engraver. It lets you engrave many different objects and even has room to grow with various adapters you could make for it. There are some designs out there for other rotary engravers you can use. I can recommend this as-is 100% though.
M. Eric Carr –
I finally decided to try this after becoming frustrated with trying to dial in the generic “5W” laser that came with my 3018. This one is larger, so you’ll have to find a way to mount it securely. (I recommend a 3D printer.) Once it’s mounted, though, it’s worlds apart from the original laser. It cuts through 1.5mm plywood at 90% power and 200mm/min, where the old laser was struggling at 100% power and 30mm/min. I’m dialing in power, contrast, and speed for engraving images now — and the difference there is just as impressive. I’m getting actual grayscale (okay, brownscale) images engraved, with subtle shadings instead of just burned or untouched.Yeah, it costs about what I paid for the CNC alone — but it makes cutting and engraving wood actually work. They say it can engrave some metals, but I think I’ll wait for one of the usual YouTube suspects to try that first. For now, I’m having fun burning images and cutting lattice hinges.I would be remiss if I didn’t gripe a little about the control mounting — you have to remove the top cover in order to access the mounting holes to fit it to the 20mm rail on the CNC. This means undoing the four bolts that hold the assembly together, and is a huge hassle. I’d take a star away, except that the rest of the module looks and feels super solid and well-made, and since hooking it up, it’s done whatever is asked of it.Bottom line — this is a solid laser, and definitely worth the price.